Back near the beginning of the year, when I put together the plan for my dream garden, I never thought I would wind up installing it this year! After a lot of planning, research, and cost analysis, I got the OK from my spouse to move forward with my plan.
First, I plotted out the section of yard I wanted. This wasn’t too hard as I was just expanding and squaring off the section I expanded last year. Then I removed the existing mulch and pulled the sod and put it aside under plastic to kill it (most of it wasn’t desirable grasses). While pricing out materials at one of the big box stores, I found some 2x2x8″ bricks on clearance, so I picked up a fair amount of those to use for edging. I did my best to level the garden area and installed the edging as level as possible. This proved a little tricky considering the grade slopes ever so gently away from the house, but I managed to make it work. Weed barrier was laid down and secured and next came the boxes.
Math is not necessarily my strong suit, and I took a fair amount of time to work out how to make the least amount of cuts for my raised beds. Off to the big box store again for lumber and hardware – corner brackets that cost more than the lumber! These materials camped out in my garage for a couple of weeks while the weather decided what to do. I finally had a few good days coming up in the forecast, so I bribed my husband to help me cut the lumber so I could go to work in the garden the next day. Once again, I spent an hour or so making sure the corners joined in a way to not get something like a parallelogram and I went to work.
Now that the boxes were done and roughly placed, I needed to figure out the best way to fill them and mulch the paths. Filling came first and I found a local dirt guy who also sold a compost that sounded lovely – chicken & horse manure, mushroom compost and a few others I can’t remember. So I ordered a combination of soil and compost and had it delivered. I started filling the beds and realized that there was no way I was going to be able to complete the job by myself, and rain was predicted for the next day. That soil HAD to get in. Luckily, my neighbor and his teenage son took pity on my and using two wheelbarrows, managed to get the rest of the fill in the beds. The best part, was finding this guy:
 This would be Lord Voldewart or, The Toad That Shall Not Be Named. He hitched a ride on the truck and got unceremoniously dumped on my driveway, then scooped up and dumped out of a wheelbarrow. He now has his own tank, fresh water, and fresh food. He’s one happy toad!
About a week later, I scheduled mulch to be delivered and installed in my backyard. The landscaping in the back is along the entire perimeter of the yard, plus the back of the house and my garden area. The guys edged my beds and installed the mulch. I finally had a proper garden! Since then I have installed grids for square foot gardening (using a vinyl folding “door” that I found at the hardware store, it has narrow slats that I could remove and cut to length – even better, I can write on it with pencil) transplanted my thyme, oregano and parsley, planted my onions and garlic, and sowed everything else directly in the planting beds. In the past two weeks, I have installed trellises and kept an eye on things. Nearly everything has sprouted and some things are doing fantastic. The herbs are VERY happy in their new location and I have radishes that I will be harvesting any day now. In the two beds I used last year I am planting strawberries and romaine lettuce. The one I planted lettuce in was an afterthought. I wasn’t planning on using it, but I needed to do something with extra compost/soil so it got filled, I figured I might as well put it to use.
I’m also impressed that everything I dug up, divided and transplanted is not only surviving, but thriving and doing extremely well. The daffodils bloomed right on schedule, the geranium looks like it was there all along, and the Ozark blue star is starting to bloom.
Today I spent a fair amount of time weeding. While the compost was a great find, I have discovered that it was absolutely riddled with seeds. Some are clover, which I’m tempted to leave as a green mulch, some look like radishes, some look sort of like carrots, and others look like weeds and grass. I figure if I pull a bunch this year, next year it shouldn’t be as hard. I’ve left a few that look like something useful just to see what comes out of them.
Speaking of pulling, I completed the first blitz of garlic mustard eradication. I’m pulling more as I find it, and had a disheartening discovery. It seems as though it is running rampant in my neighbors yard, and being that he’s elderly, it’s not going away anytime soon. I’ve considered mentioning it, but honestly, I would wind up getting stuck pulling it all, and I’m just not willing to put in all that extra work for the next few years. I’ll be happy if I can keep the stuff in my yard under control. Next time I see the person that does his yardwork, I may mention it.
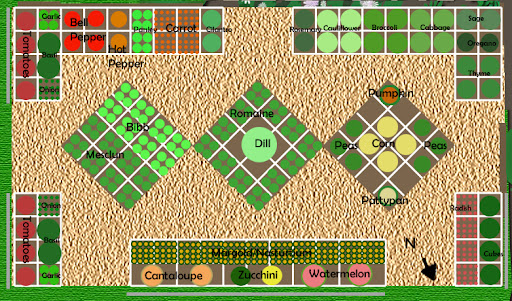
So this is what my garden looked like when it was finally installed. Parts of it are much greener already, and nearly every square foot has a sprout (or more) in it. There are also more trellises along the outside of the longest bed and on the right hand side.


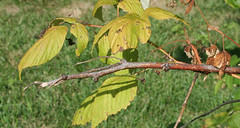
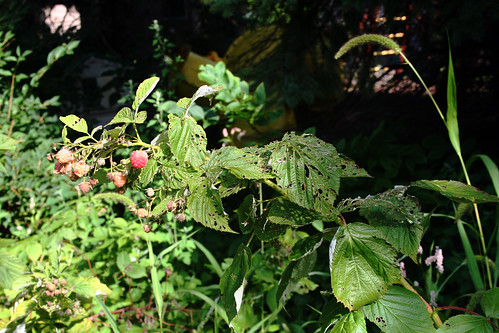
I’m off to research chemical free ways to eradicate massive anthills. I may have mentioned before that our entire neighborhood seems to have been built on an established carpenter ant population. Unfortunately, they like to make their hills near my edibles. Every year there is one near, or in, my raspberry patch, and this year I have a bonus one adjacent to one of my planting beds. It’s quite fun watching them carry mulch to their home, they are amazingly strong little guys. I’ve heard some judiciously applied boiling water may do the trick, but whatever I do, I have to be careful not to splash or otherwise harm my tomatoes. If anybody has any viable solutions, I’m all ears.

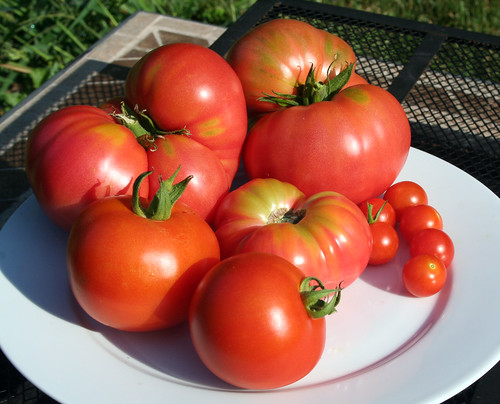
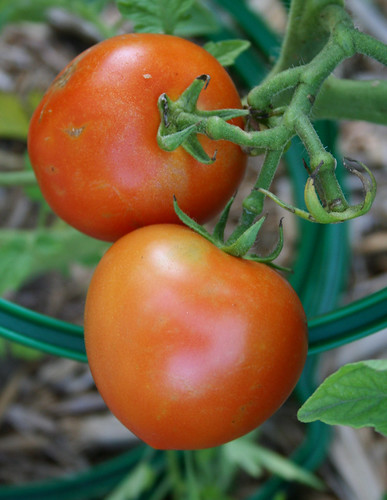
 Organic Gardening magazine is one of the subscriptions I look forward to getting in my mailbox. The latest issue has a whole article on tomatoes with a few different contributors. I like growing tomatoes as much as the next person, and I’ve had my share of successes and failures. But I still keep at it hoping for the best. With the current trend of gardening and local food is still on an upswing, I feel as though encouraging everyone that has even the littlest of space to try to garden is called for (even if all you have is a sunny balcony, you can plant tomatoes in a container and grow a variety of herbs). My biggest beef came with this quote from chef Alex Lee. It was even highlighted on the page:


